Setup ngTest step on Bitrise.io

Bitrise’s buit-in karma jasmine testRunner seems out-of-date, every time gives error:

‘@angular-devkit/build-angular/plugins/karma’ karma plugin is meant to be used from within Angular CLI and will not work correctly outside of it.

It’s not hard to create a script step, things to do:

1. Download chrome.

brew update && brew cask install chromedriver google-chrome

Quite often, we got checksum error, possible cause, network cache, solution: directly run script from github repo, ideally from your forked repo to avoid cache.

brew cask install https://raw.githubusercontent.com/maodd/homebrew-cask/master/Casks/google-chrome.rb

2. Run ngTest, non-watch mode, so it can close itself after done.

./node_modules/@angular/cli/bin/ng test –watch=false –code-coverage

3. (Optional) Collect code coverage report.

The challenge here is Bitrise can deploy a folder as artifact, we need to find a way display report in single html file, also to keep the original multiple test files as many as possible.

We use a html-inline npm package to compact test report files, also zip the whole test result into a single file, and artifact both files.

if [ -d "$BITRISE_SOURCE_DIR/coverage" ]; then
   zip -r $BITRISE_DEPLOY_DIR/coverage.zip $BITRISE_SOURCE_DIR/coverage
   npm i -g html-inline
   html-inline -i $BITRISE_SOURCE_DIR/coverage/index.html -o coverage.html
   cp coverage.html $BITRISE_DEPLOY_DIR
fi

The artifacts for each build looks like this:

Screen Shot 2020-04-03 at 9.20.20 AM.png

Subfolder links inside the coverage report won’t work, but it’s good enough for us, until we can find a better html-package tool.

Distribute Internal/Beta Mobile Apps

If you have apps do not want to publish to general public, e.g. internal or beta apps, keep reading.

For iOS apps, for far the best solution is still TestFlight, the best advantage is no need to collect end users UUID, like the adHoc way distribution. The Beta TestFlight also has public link feature.

For Android apps, google Playstore alpha/beta release is OK, but you need to collect tester’s google id, refresh time always has delay.

For small distribution, DeployGate Free plan provides 20 devices, with auto-update and public url features, can be a good choice.

If distribution larger than 20, if you already use bitrise.io as CI, currently their Ship(beta) is fairly easy to use, just ensure you have the Deploy to bitrise step at version 1.9.x+.

Also, since by default, bitrise keep both unsigned and signed apk as deploy artifacts, the ship(beta) just simply use the first one as distribution target, it would be a good idea just set the signed apk to deploy.

Screen Shot 2020-04-01 at 10.44.12 AM.png

You will get a nice public page for this signed APK, most of time.

Screen Shot 2020-04-01 at 11.22.49 AM.png

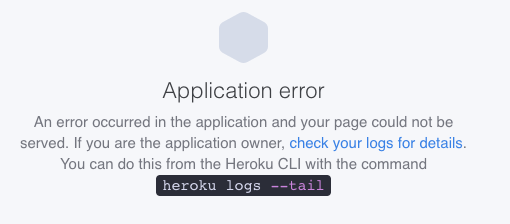
Since ship is still in beta. Sometimes you might get a heroku error. 😦

Screen Shot 2020-04-01 at 10.53.52 AM.png

espoCRM customization: allow non-sysadmin user edit users data

problem: be default, espoCRM only expose users data to users with sysadmin role. in role access management, user entity is not in the manage entity list.

solution:

1. override acl of user entity at custom/Espo/Custom/Resources/metadata/scopes/User.json. add edit in aclActionList, add “team”, “all” in aclActionLevelListMap.

    "aclActionList": ["read", "edit"],
    "aclActionLevelListMap": {
        "edit": ["own", "no", "team", "all"]
    },

2. override acl user.php at custom/Espo/Custom/Acl/User.php. ensure to remove or change line of

        if (!$user->isAdmin()) {
            if ($user->id !== $entity->id) {
                return false; // change this logic
            }
        }

ref: how to 

Represent NSData in String in compact way

Parse.com supports local database, use case is to save file locally first then later upload to server when internet is available.

Offline time maybe weeks.

Native solution as saving data as PFFile (s3) doesn’t work in this case.

Need to find a way to save NSData in String then save as a regular parse db column.

There is a size limit of 128kb for each column.

Good news is my files aren’t too large, one docx is only 86kb.

The problem is if I use NSData.hexstring representation, (same as data.description), the string representation size is quite big, up to 176kb, almost doubled from original 86kb.

Found 2 github lib, (https://github.com/1024jp/NSData-GZIP) and (https://github.com/leemorgan/NSData-Compression), compress ratio aren’t good enough.

original file size: 86069
original string representation size: 172152
size compressedDataLZ4: 163114
size compressedDataLZFSE: 163538
size compressedDataLZMA: 162296
size compressedDataZLIB: 161740

compress size using gzip: 161712

Must be a better way to represent nsdata in string.

For now, this works. At least the docx file can be open after conversion.


let str = NSString(data: self.docData!, encoding: NSWindowsCP1254StringEncoding)
print("original size: \((str as! String).characters.count)");

let data = str?.dataUsingEncoding(NSWindowsCP1254StringEncoding, allowLossyConversion:false )

let tmpPath = NSString(string:"~/tmp/")  .stringByExpandingTildeInPath

let result = data?.writeToFile(tmpPath+"/1.docx", atomically: true)

In fact the base64encoding for NSData is pretty small already. no need to waste time to compress by yourself.

Learning RxSwift – rewrite Variable

Code example of how to implement prepend and append newer/older items to an existing(already bounded) list.

import Foundation
import RxSwift

func fetchEarlierItemsThan(latestItem: Int?) -> Observable<[Int]> {
    if let latestItem = latestItem {
        return just([latestItem - 1])
    }
    return just([0])
}

func fetchLaterItemsThan(latestItem: Int?) -> Observable<[Int]> {
    if let latestItem = latestItem {
        return just([latestItem + 1])
    }
    return just([0])
}

let prependStream = PublishSubject<Void>()

let appendStream = PublishSubject<Void>()

let currentPostList = Variable([Int]())

let prependItems = prependStream
    .withLatestFrom(currentPostList.asObservable()) { _, prependItems -> Observable<[Int]> in
        return fetchEarlierItemsThan(prependItems.first)
            .map { newItemsToPrepend in newItemsToPrepend + prependItems }
    }
    .switchLatest()
    .subscribeNext {
        currentPostList.value = $0
    }

let appendItems = appendStream
    .withLatestFrom(currentPostList.asObservable()) { _, appendItems -> Observable<[Int]> in
        return fetchLaterItemsThan(appendItems.last)
            .map { newItemsToAppend in appendItems + newItemsToAppend }
    }
    .switchLatest()
    .subscribeNext {
        currentPostList.value = $0
}

currentPostList.subscribeNext {
    NSLog("\($0)")
}

appendStream.onNext(())
prependStream.onNext(())
appendStream.onNext(())
prependStream.onNext(())

playground output:
2016-01-08 11:46:23.031 Introduction[60454:5285520] []
2016-01-08 11:46:23.035 Introduction[60454:5285520] [0]
2016-01-08 11:46:23.039 Introduction[60454:5285520] [-1, 0]
2016-01-08 11:46:23.042 Introduction[60454:5285520] [-1, 0, 1]
2016-01-08 11:46:23.045 Introduction[60454:5285520] [-2, -1, 0, 1]
2016-01-08 11:46:23.049 Introduction[60454:5285520] [-3, -2, -1, 0, 1]
2016-01-08 11:46:23.052 Introduction[60454:5285520] [-4, -3, -2, -1, 0, 1]

SignIn with GooglePlus in iOS App without flipping between Safari

If your app has been using Google+ login for years, and suddenly the recent update got rejected with message like this:

Specifically, the app opens a web page in mobile Safari for Google+ authentication, then returns the user to the app. The user should be able to sign in to Google+ without opening Safari.

It’s time to upgrade google sign-in SDK, here is the online guide: https://developers.google.com/identity/sign-in/ios/start

Unfortunately, there are some confusion in that guide, hope the following tips can help you:

Steps

  1. Download Google Sign-in SDK (2.2.0 as is now), add GoogleSignIn.bundle and GoogleSignIn.framework  to project. I am using manually instead of coacapods. (Recently pod caused enough problems to my other projects.)
  2. Get a Google Sign-In configuration file, from which you will find client-id, revised client-id which are needed later. This file itself is not in use.
  3. Add 2 more entry to project target info.plist file, I left facebook setup here so we can compare
    <key>CFBundleURLTypes</key>
    <array>
    <dict>
    <key>CFBundleTypeRole</key>
    <string>Editor</string>
    <key>CFBundleURLSchemes</key>
    <array>
    <string>fb425980604155625</string>
    </array>
    </dict>
    <dict>
    <key>CFBundleTypeRole</key>
    <string>Editor</string>
    <key>CFBundleURLName</key>
    <string>com.foodplannerapp</string>
    <key>CFBundleURLSchemes</key>
    <array>
    <string>com.foodplannerapp</string>
    </array>
    </dict>
    <dict>
    <key>CFBundleTypeRole</key>
    <string>Editor</string>
    <key>CFBundleURLSchemes</key>
    <array>
    <string>com.googleusercontent.apps.1070812041215-ap9sle5s7qnaqgeov8emb2r28simo39c</string>
    </array>
    </dict>
    <dict>
    <key>CFBundleTypeRole</key>
    <string>Editor</string>
    <key>CFBundleURLSchemes</key>
    <array>
    <string>com.foodplannerapp</string>
    </array>
    </dict>
    </array>
    
    
  4. Code implementation, following online guide: https://developers.google.com/identity/sign-in/ios/sign-in
    Note: You might encounter 2 difficulties here:

    a) Can’t add GIDSignInButton,
    Workaround: create your own IBAction method:

    - (IBAction)signInWithGooglePlus:(id)sender
    {
    [[GIDSignIn sharedInstance] signIn];
    }
    

    b) Runtime Error:

    When |allowsSignInWithWebView| is enabled, uiDelegate must either be a |UIViewController| or implement the |signIn:presentViewController:| and |signIn:dismissViewController:| methods from |GIDSignInUIDelegate|

    Solution: assign uiDelegate.

    [GIDSignIn sharedInstance].clientID = kClientID;
    [GIDSignIn sharedInstance].delegate = self;
    [GIDSignIn sharedInstance].uiDelegate = self;
    //the following line is optional, default value is YES anyway
    [GIDSignIn sharedInstance].allowsSignInWithWebView = YES; 
    

Observation: application:openURL: method is not called, as described as step 3 in doc: https://developers.google.com/identity/sign-in/ios/sign-in
The main purpose of using new SDK is to remove flipping between Safari, but if you do what to use flipping Safari to login google+, set allowsSignInWithWebView to NO, wala! you are back to old times, and get ready to see your app being rejected by Apple.

How to draw a wavy line in iOS app?

My client reached me asking me to add a new line type to the existing iOS app I wrote to them:

I did some research, drawing a curve line is easy, like this post pointed out, all I need is just code like this:


CGContextRef context = UIGraphicsGetCurrentContext();
CGContextSetLineWidth(context, 2.0);
CGContextSetStrokeColorWithColor(context, [UIColor blueColor].CGColor);
CGContextBeginPath(context);
CGContextMoveToPoint(context, 100, 100);
CGContextAddCurveToPoint(context,125,150,175,150,200,100);
CGContextAddCurveToPoint(context,225,50,275,75,300,200);
CGContextStrokePath(context);

Now the challenge is, how to calculate the waypoint on the fly when user touched the screen? Time to polish my high school Math skills….

Here is my solution:

wavy line

Steps:

  1. Get start and end points (x1,y1) and (x2, y2)
  2. Calculating  one of the quart point. (x3, y3)
  3. those 2 angles alpha are the same, and alpha = atan((x2-x1)/(y1-y2))
  4. the waypoint (x4,y4) is possible to get now, x4 = x3 – sin(alpha) * wave_height, y4 = y4 – cos(alpha) * wave_height.

Here is the end result:

Next Step:

As video shows, when moving speed is not steady, the wavy line looks funny, that’s because I always start from negative sin first, to make it transiting smoother I think I should record the last stopped calculation for (x4,y4), so the continuing calculation will just do the other way. Anyway, this is not an issue when moving speed is steady.

Useful marcos for iOS dev


#define UIColorFromRGB(rgbValue) [UIColor colorWithRed:((float)((rgbValue & 0xFF0000) >> 16))/255.0 green:((float)((rgbValue & 0xFF00) >> 8))/255.0 blue:((float)(rgbValue & 0xFF))/255.0 alpha:1.0]

e.g.: view.backgroundColor = UIColorFromRGB(0xF4F4F4);

Remote logging in iOS app

Testflight used to have this Remote Logging feature, even it’s not very stable, log occasionally failed to record, but it’s still better than nothing.

Unfortunately, Apple didn’t keep it after bought TestFlight.

I have played a while BugFender, very great service!

Free registration, download SDK.

Add this line somewhere in marco of your app:

#define NSLog(...) BFLog(__VA_ARGS__)

All existing NSLog will redirect to Bugfender!

Auto increase build number in XCode

Apple demand the build number on each app version must be higher than previous one. I found this script to auto increase build number based on git log history entry number, and have been using it for quite a long time, very handy.

1
2
3
4
5
6
7
8
9
#Update build number with number of git commits if in release mode
if[ ${CONFIGURATION} == "Release"] || [ ${CONFIGURATION} == "AdHoc"]; then
buildNumber=$(git rev-list HEAD | wc -l | tr -d ' ')
/usr/libexec/PlistBuddy -c "Set :CFBundleVersion $buildNumber""${PROJECT_DIR}/${INFOPLIST_FILE}"
fi;

the only ting to remember is always do a push before build.

There is another way to increase build number by creating a local cfg file to save this number and increase by perl script. Found on hockeyapp.